Goal
Add two custom fields to the native WordPress post object and insert the custom field data into the post content. This screenshot shows where we want to end up: 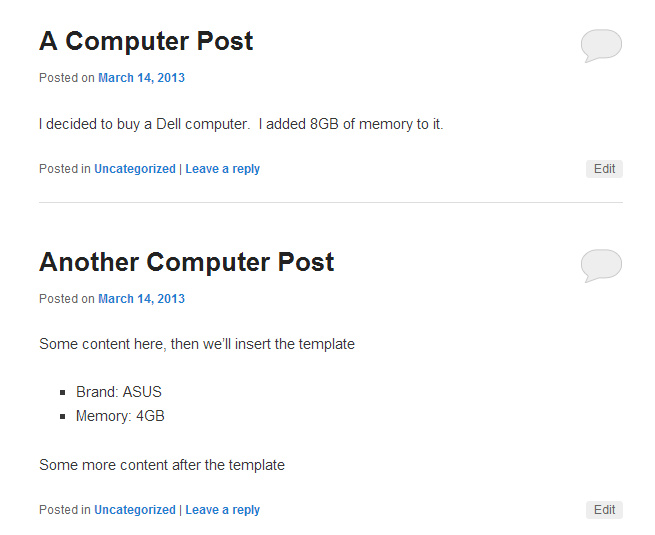
Extend the WordPress Post
- Pods Admin -> Add New
- Choose “Extend Existing”
- Select Content Type: ‘Post Types (Posts, Pages, etc..)’
- Select Post Type: ‘Posts’
- Click ‘Next Step’
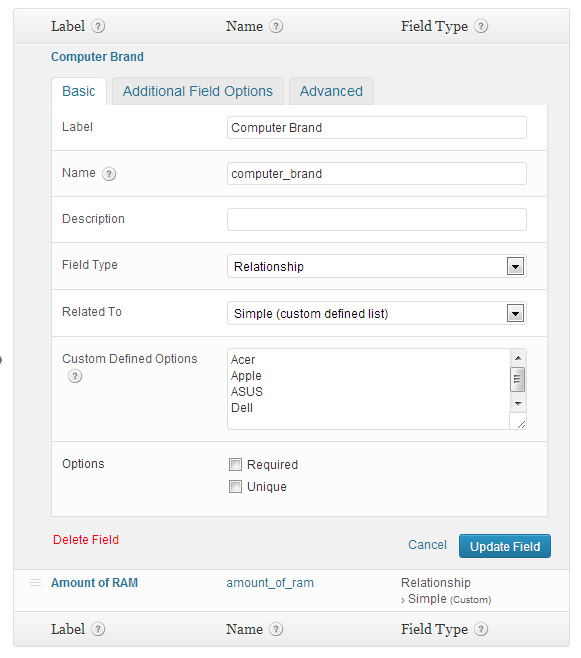
This should setup the extended post and take you to the Manage Fields screen. In our example scenario we want two extra fields, each with a drop-down list of a reasonable number of predetermined values. We create the fields as shown and click the “Save Pod” button:
Insert Single Fields into the Post Content
We’ve done everything we need in order to extend WordPress posts to include our custom fields as drop-downs below the post content box. Inserting single fields by field name into our post content is easy with the pods shortcode: 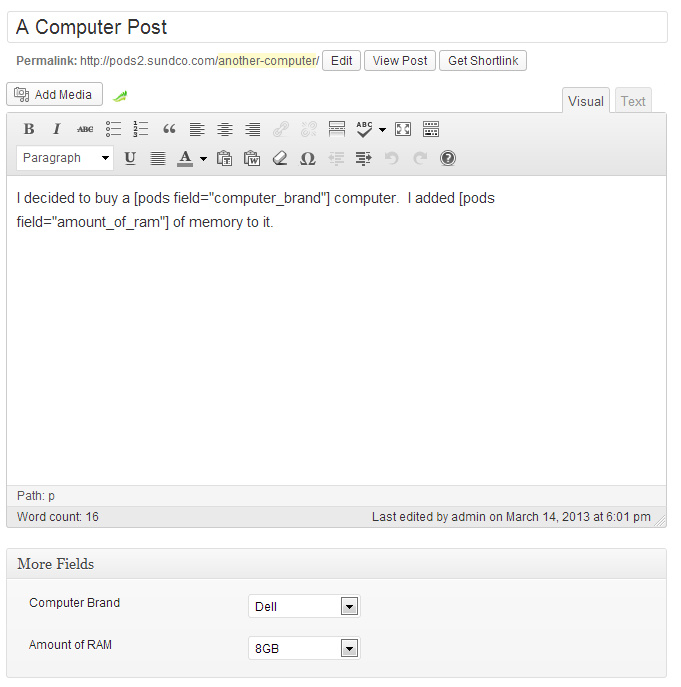
Creating and Using a Pods Template
Inserting single fields wherever we want is easy and flexible but we may want a more complex presentation of the information. We might also like to reuse a common layout frequently. Pods Templates are very handy for this situation
- Enable “Templates” under the Pods Admin -> Components menu.
- Create a new template as shown:
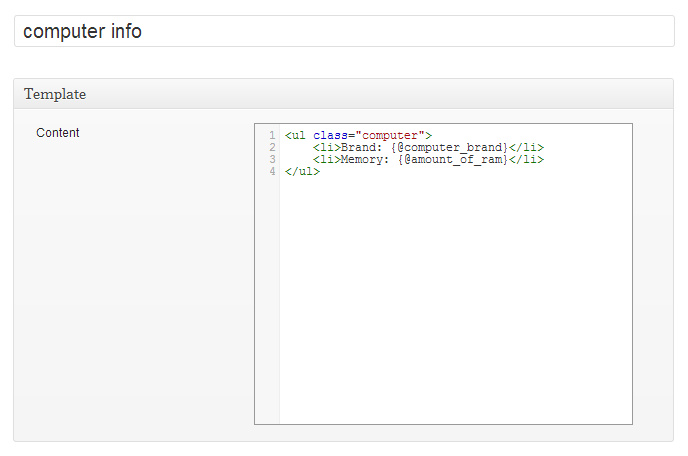 In our example, we want to put the information in an unordered list with a specific class we can target through CSS if needed. Pods Magic Tags are used in Pods Templates as a placeholder for the field we want to insert. Magic Tags are in the format: {@field_name}.
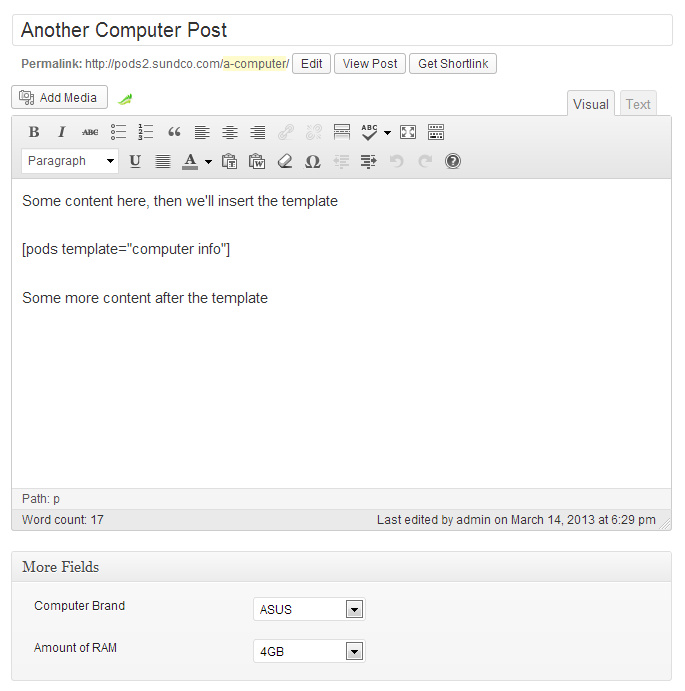
Insert the Pods Template into Post Content
Inserting the template output into a WordPress post is a simple shortcode with the name of the template: